Saturday, August 31, 2013

"WitchesAnd Vampires"

This tutorial was written by me on August 30, 2013. Any resemblance to any other tutorial is pure coincidence. Please DO NOT claim this tutorial as your own or post it to any other blog or website without permission from me. It was written for PSP X2, but should be compatible with any version of PSP. I wrote it assuming that you have a working knowledge of PSP and it's components.
My tutorials should only be used only as a guideline

Supplies Needed:
Tube Of Choice I am using a tube from©verymany

You must have a license and purchase tubes to use them
You can purchase their tubes here:
www.picsfordesign.com

PTU Scrap Kit "QBD_ISeeVampires_Tagger_ byQueenBrat Designs
visit their blog site here:
http://bitsnpiecesofqbd.blogspot.com/

Mask of choice
I used wsl Mask 84
Get it here:
http://weescotslasscreations.blogspot.com/2009/04/masks.html


font of choice

Plug Ins
Xero porcelain

Ok Lets get started Drop shadow 1,1,60,5

Open blank image 600 x 600

New raster layer, selections, select all


Copy and PasteQBD_ISeeVampires_Paper03 nto selection
Apply mask, merge group.
Copy and Paste QBD_ISeeVampires_Frame02As A New Layer  Drop shadow

Copy and Paste Frame 1 As A New LayerUsing magic wand , select inside frame , select, modify , expand by 5, New raster


layer,
Copy and Paste QBD_ISeeVampires_Paper062As A New Layer selections invert delete move below frame layer

Keep selected,
Copy and PasteQBD_ISeeVampires_Bow01As A New Layer  Drop shadow

Copy and Paste QBD_ISeeVampires_Boot01  Drop shadow

Copy and Paste QBD_ISeeVampires_BloodSplatter02 Drop shadow layers arrange send to bottom
layers merge visible duplicate 2x for 3 copies add name and copyrigh layers merge


Copy and Paste QBD_ISeeVampires_Coffin02shadow


Add your name and copyright
layers merge visible save as a png

Thank you for trying my tutorial
I would love to see your results
and show off here
email your results here:
Deborah1023@gmail.com
canvas size resize 625 x 625

Copy and Paste paper (6) as a new layer

Layers, load save mask and apply mask
layers, merge group

Go to Raster 1 selections, select all, selections float, selections defloat
Copy and Paste paper (5) as a new layer
Selections Invert, delete
drop shadow
delete raster 1

Friday, August 30, 2013

WHEN HELL FREEZES OVER

This tutorial was written by me on August 30, 2013. Any resemblance to any other tutorial is pure coincidence. Please DO NOT claim this tutorial as your own or post it to any other blog or website without permission from me. It was written for PSP X2, but should be compatible with any version of PSP. I wrote it assuming that you have a working knowledge of PSP and it's components.
My tutorials should only be used only as a guideline

Supplies Needed:
Tube Of Choice I am using a tube from©verymany

You must have a license and purchase tubes to use them
You can purchase their tubes here:
www.picsfordesign.com

PTU Scrap Kit "WHEN HELL FREEZES OVER_ by Anna’s AtticDesignsvisit their blog site here:
http://annazattic.blogspot.com/

Saturday, August 24, 2013

Golden BirdSong

This tutorial was written by me on August 22,2013. Any resemblance to any other tutorial is pure coincidence. Please DO NOT claim this tutorial as your own or post it to any other blog or website without permission from me. It was written for PSP X2, but should be compatible with any version of PSP. I wrote it assuming that you have a working knowledge of PSP and it's components.
My tutorials should only be used only as a guideline

Supplies Needed:
Tube Of Choice I am using a tube from ©Zlata_M,


You must have a license and purchase tubes to use them
You can purchase their tubes here:
www.picsfordesigncom
FwTags Golden BirdSong by FwTags
You Can get it here
Here:
http://berryapplicious.com/store/index.php?main_page=index&manufacturers_id=76


and now;
http://sensibilityscrapping.com/index.php?main_page=index&manufacturers_id=63
http://fwtagscreations.blogspot.co.uk/


Mask of choice
I used Vix Big Mask 001
Get it here:
http://designsbyvaybs.blogspot.com/search/label/Masks

font of choice


Ok Lets get started Drop shadow 1,1,60,5

Open blank image 600 x 600

New raster layer, selections, select all


Copy and Paste FwTags Golden BirdSong Papers (4) into selection
Apply mask, merge group.
Copy and Paste Element_18 As A New Layer  Drop shadow duplicate  mirror

Copy and PasteFwTags Golden Birdsong frames (3) As A New Layer
Using magic wand , select inside frame , select, modify , expand by 5,


Drop shadow Copy and PasteFwTags Golden BirdSong Papers (3)As A New Layer selections invert delete  layerArrange, move down.

Keep selected, add tube as a new layer,
Copy and Paste FwTags Golden BirdSong (9) resize by 40% Drop shadow

http://tagsbydeborah.blogspot.com/2013/08/serenity.html

Copy and Paste FwTags Golden BirdSong (5)  resize by 40%Drop shadow

Copy and PasteFwTags Golden BirdSong (6) resize by 40%Drop shadow

Copy and Paste FwTags Golden BirdSong (24) resize by 40%Drop shadow
Copy and PasteFwTags Golden BirdSong (29) resize by 40%Drop shadow

Add your name and copyright
layers merge visible save as a png

Thank you for trying my tutorial
I would love to see your results
and show off here
email your results here:
Deborah1023@gmail.com

Thursday, August 22, 2013

Serenity

This tutorial was written by me on August 22,2013. Any resemblance to any other tutorial is pure coincidence. Please DO NOT claim this tutorial as your own or post it to any other blog or website without permission from me. It was written for PSP X2, but should be compatible with any version of PSP. I wrote it assuming that you have a working knowledge of PSP and it's components.
My tutorials should only be used only as a guideline

Supplies Needed:
Tube Of Choice I am using a tube from ©verrymany,


You must have a license and purchase tubes to use them
You can purchase their tubes here:
www.picsfordesigncom
HS_Serenity by Honored Scraps
You Can get it here
Here:

http://honoredscraps.blogspot.com/


http://honoredscraps.com/store

http://treasuredscraps.com/store


Mask of choice
I used wsl Mask 84
Get it here:
http://weescotslasscreations.blogspot.com/2009/04/masks.html
font of choice

Plug Ins


Mura Meister CopiesOk Lets get started Drop shadow 1,1,60,5

Open blank image 600 x 600

New raster layer, selections, select all


Copy and Paste Paper_12 into selection
Apply mask, merge group.
Copy and Paste Element_18 As A New Layer  Drop shadow duplicate  mirror

Copy and Paste Element_33 As A New Layer
Using magic wand , select inside frame , select, modify , expand by 5,


Arrange, move down. Drop shadow Copy and PastePaper_05) As A New Layer selections invert delete move below frame  layer

Keep selected, add tube as a new layer,
Copy and Paste Element_09  Drop shadow


Copy and Paste Element_05  Drop shadow

Copy and PasteElement_24 Drop shadow

Copy and Paste Element_29  Drop shadow


Add your name and copyright
layers merge visible save as a png

Thank you for trying my tutorial
I would love to see your results
and show off here
email your results here:
Deborah1023@gmail.com

Wednesday, August 21, 2013

I_Love_My)Dog

This tutorial was written by me on August 21, 2013. Any resemblance to any other tutorial is pure coincidence. Please DO NOT claim this tutorial as your own or post it to any other blog or website without permission from me. It was written for PSP X2, but should be compatible with any version of PSP. I wrote it assuming that you have a working knowledge of PSP and it's components.
My tutorials should only be used only as a guideline

Supplies Needed:
Tube Of Choice I am using a tube from©Keith Garvey,

You must have a license and purchase tubes to use them
You can purchase their tubes here:
www.garvgraphx.com

Gorgeous PTU Scrap Kit "FairyDusk" by Cindy's Creative Designs
visit their blog site here:
 http://cindyscreativedesings.blogspot.com/

Mask of choice
I used wsl Mask 84
Get it here:
http://weescotslasscreations.blogspot.com/2009/04/masks.html


font of choice

Plug Ins
Xero porcelain

Ok Lets get started Drop shadow 1,1,60,5

Open blank image 600 x 600

New raster layer, selections, select all


Copy and Paste ccd_paper3 into selection
Apply mask, merge group.
Copy and Paste RD_ES_HeartSwirl As A New Layer  Drop shadow

Copy and Paste ccd_frame1 As A New Layer


Using magic wand , select inside frame , select, modify , expand by 5, New raster layer,
Copy and Paste ccd_paper2 As A New Layer selections invert delete move below frame layer

Keep selected, add tube as a new layer, duplicate,select original tube delete, select none.
Move copy of tube above frame, using eraser, remove any parts from bottom of frame.
Copy and Paste ele59 As A New Layer  Drop shadow

Copy and Paste ccd_flowers7  resize40% Drop shadow

Copy and Paste ccd_flowers5  resize40%  Drop shadow
layers


Copy and Paste ccd_flowers8 resize40%Drop shadow
Using magic wand , select insidedeco3  , select, modify , expand by 5,
Copy and Paste ccd_deco3 Phone resize40% Drop shadowCopy and Paste ccd_paper15 As A New Layer selections invert delete Copy and Paste whatever you like for your locket picture  I used ccd_dog1invert delete

Copy and Paste ccd_bird2 resize40%  Drop shadow

Copy and Paste ccd_leaves4  resize40%  Drop shadow arrange send to bottom

Copy and Paste ccd_butterfly1  resize40%  Drop shadow

Copy and Paste ccd_dog1_  image Mirror resize70%  Drop shadow

Add your name and copyright
layers merge visible Apply porcelain effect default settings
save as a png

Thank you for trying my tutorial
I would love to see your results
and show off here
email your results here:
Deborah1023@gmail.com

Endless Story

This tutorial was written by me on August 21,2013. Any resemblance to any other tutorial is pure coincidence. Please DO NOT claim this tutorial as your own or post it to any other blog or website without permission from me. It was written for PSP X2, but should be compatible with any version of PSP. I wrote it assuming that you have a working knowledge of PSP and it's components.
My tutorials should only be used only as a guideline

Supplies Needed:
Tube Of Choice I am using a tube from ©Keith Garvey,


You must have a license and purchase tubes to use them
You can purchase their tubes here:
www.garvgraphx.com

 RDEndlessStory by Rissa's Designs
You Can get it here
Here:
http://rissasdesigns.blogspot.com/


Mask of choice
I used wsl Mask 84
Get it here:
http://weescotslasscreations.blogspot.com/2009/04/masks.html
font of choice

Plug Ins


Ok Lets get started Drop shadow 1,1,60,5

Open blank image 600 x 600

New raster layer, selections, select all


Copy and Paste RD_ES_Paper01 into selection
Apply mask, merge group.
Copy and Paste RD_ES_HeartSwirl As A New Layer  Drop shadow

Copy and Paste RD_ES_Frame04 As A New Layer


Using magic wand , select inside frame , select, modify , expand by 5, New raster layer,
Copy and Paste RD_ES_Paper03 As A New Layer selections invert delete move below frame layer

Keep selected, add tube as a new layer, duplicate,select original tube delete, select none.
Move copy of tube above frame, using eraser, remove any parts from bottom of frame.
Copy and Paste ele59 As A New Layer  Drop shadow

Copy and Paste RD_ES_FlowerFastener  resize40% Drop shadow

Copy and Paste RD_ES_Flower02 Drop shadow duplicate
layers


Copy and Paste RD_ES_Flower05 resize40%again by 65 % Drop shadow

Copy and Paste RD_ES_Phone resize40% Drop shadow

Copy and Paste RD_ES_Perfume resize40%  Drop shadow

Copy and Paste RD_ES_Lipstick  resize40%  Drop shadow

Copy and Paste RD_ES_Ribbon02  resize40%  Drop shadow

Copy and Paste RD_ES_Mirror  image mirro resize40%  Drop shadow duplicate your tube, resize and mirror with magic wand click inside the mirror. arrange your tube your liking invert and delete lower opacity to around 85

Add your name and copyright
layers merge visible save as a png

Thank you for trying my tutorial
I would love to see your results
and show off here
email your results here:
Deborah1023@gmail.com

Tuesday, August 20, 2013

HappyFall

This tutorial was written by me on August 20 2013. Any resemblance to any other tutorial is pure coincidence. Please DO NOT claim this tutorial as your own or post it to any other blog or website without permission from me. It was written for PSP X2, but should be compatible with any version of PSP. I wrote it assuming that you have a working knowledge of PSP and it's components.
My tutorials should only be used only as a guideline

Supplies Needed:
Tube Of Choice I am using a tube from © Zlata_M,


You must have a license and purchase tubes to use them
You can purchase their tubes here:
www.picsfordesigncom

 MRSW_FallColors by Mouseclicks
You Can get it here
Here:
http://mouse-clicks.blogspot.com/


Mask of choice
I used wsl Mask 84
Get it here:
http://weescotslasscreations.blogspot.com/2009/04/masks.html
font of choice

Plug Ins


Mura Meister CopiesOk Lets get started Drop shadow 1,1,60,5

Open blank image 600 x 600

New raster layer, selections, select all


Copy and Paste paper (3) into selection
Apply mask, merge group.
Copy and Paste doodle01As A New Layer  Drop shadow

Copy and Paste sequin03 As A New Layer resize70%
Apply Meister Copies Following settings


Using lasso tool poin to point outline the circled sequins
Arrange, move down. Drop shadow Copy and Paste paper (2) As A New Layer selections invert delete move below circled sequins  layer

Keep selected, add tube as a new layer,
Copy and Paste bow03resize45%  Drop shadow


Copy and Paste extra07 resize40%  Drop shadow duplicate several times placing all around bacground repeat using extra03

back on top layer


Add your name and copyright
layers merge visible save as a png

Thank you for trying my tutorial
I would love to see your results
and show off here
email your results here:
Deborah1023@gmail.com

Monday, August 19, 2013

Romance

This tutorial was written by me on August 19, 2013. Any resemblance to any other tutorial is pure coincidence. Please DO NOT claim this tutorial as your own or post it to any other blog or website without permission from me. It was written for PSP X2, but should be compatible with any version of PSP. I wrote it assuming that you have a working knowledge of PSP and it's components.
My tutorials should only be used only as a guideline

Supplies Needed:
Tube Of Choice I am using a tube from © verymany,


You must have a license and purchase tubes to use them
You can purchase their tubes here:
www.picsfordesigncom

 QBD_ALilRomanceTaggers
You Can get it here
Here:
 http://bitsnpiecesofqbd.blogspot.com/

http://arkinserdigitaldesigns.com/store/


Mask of choice
I used DBV Mask 143
Get it here:
http://designsbyvaybs.blogspot.com/search/label/Masks
font of choice


Ok Lets get started Drop shadow 1,1,60,5

Open blank image 600 x 600

New raster layer, selections, select all


Copy and Paste QBD_ALilRomance_paper08 into selection
Apply mask, merge group.

Copy and Paste QBD_ALilRomance_frame05 As A New Layer


Using magic wand , select inside frame , select, modify , expand by 5, New raster layer, floodfill with color to match your tube
Arrange, move down. Drop shadow frameCopy and Paste QBD_ALilRomance_paper12 As A New Layer selections invert delete move below frame layer

Keep selected, add tube as a new layer,
Copy and Paste QBD_ALilRomance_butterfly01resize40%  As A New Layer  Drop shadow duplicate mirror

Copy and Paste QBD_ALilRomance_flowerspray02 resize40%  Drop shadow

Copy and Paste QBD_ALilRomance_flowerspray01 resize40%  Drop shadow

back on top layer

Copy and Paste QBD_ALilRomance_dragonfly02 resize40% Drop shadow

Copy and Paste QBD_ALilRomance_rose01 resize40% Drop shadow duplicate, mirror, flip

Copy and Paste QBD_ALilRomance_glitterdoodle01 resize40%  Drop shadow duplicate, mirror, flip arrange send to bottom


Add your name and copyright
layers merge visible save as a png

Thank you for trying my tutorial
I would love to see your results
and show off here
email your results here:
Deborah1023@gmail.com

TwilightLove

This tutorial was written by me on August 19, 2013. Any resemblance to any other tutorial is pure coincidence. Please DO NOT claim this tutorial as your own or post it to any other blog or website without permission from me. It was written for PSP X2, but should be compatible with any version of PSP. I wrote it assuming that you have a working knowledge of PSP and it's components.
My tutorials should only be used only as a guideline

Supplies Needed:
Tube Of Choice I am using a tube from © Arthur Crowe,


You must have a license and purchase tubes to use them
You can purchase their tubes here:
www.arthurcrowesfactory.com

 SKDS_TwilightLuvr
You Can get it here
http://scrappinkrazydesigns.blogspot.com


Mask of choice
I used AR315_Mask091
Get it here:
http://aquarebel315.blogspot.com.

font of choice

Plug Ins


Ok Lets get started Drop shadow 1,1,60,5

Open blank image 600 x 600

New raster layer, selections, select all


Copy and Paste p07 into selection
Apply mask, merge group.

Copy and Paste ele17 As A New Layer


Using magic wand , select inside frame , select, modify , expand by 5, New raster layer, floodfill with color to match your tube
Arrange, move down. Drop shadow frameCopy and Paste p08 As A New Layer selections invert delete move below frame layer

Keep selected, add tube as a new layer, duplicate,select original tube delete, select none.
Move copy of tube above frame, using eraser, remove any parts from bottom of frame.
Copy and Paste ele59 As A New Layer  Drop shadow

Copy and Paste ele10 Drop shadow

Copy and Paste ele14 Drop shadowduplicate mirror dupicate flip merge down twice
layers arrange send to bottom

back on top layer

Copy and Paste ele18 resize40% Drop shadow

Copy and Paste ele09 resize40% Drop shadow

Copy and Paste ele18 resize40%  Drop shadow

Copy and Paste ele37 Drop shadow

Copy and Paste ele06 Drop shadow

Copy and Paste ele07 Drop shadow

Add your name and copyright
layers merge visible save as a png

Thank you for trying my tutorial
I would love to see your results
and show off here
email your results here:
Deborah1023@gmail.com

Saturday, August 17, 2013

CountryGirl"

This Tut was written by me on the  August 17, 2013 Done with PSP X2 but should work with others

Supplies Needed

Tube of choice - I am using the artwork of © Arthur Crowe,
You can find it  Here
www.arthurcrowesfactory.com
You must have a proper license to use this work.

Scrapkit- "SKDS_CountryGirl"  byScrappin Krazy Designs


http://scrappinkrazydesigns.blogspot.com


font of choice


Drop shadow 1,1,60,5

Open blank image 600 x 600

New raster layer, select all, paste p10 into selection, select none.


add tube as a new layer,


Copy and Paste ele11 add drop shadowresize 80% drop shadow.

Copy and Paste ele57, add resize 80%, add drop shadow.

Copy and Paste ele93 resize 80%, add drop shadow

Copy and Paste ele88 resize 80%, add drop shadow

Copy and Paste ele85 resize40%, add drop shadow

Copy and Paste ele66 resize40%, add drop shadow

Copy and Paste ele74 resize30%, add drop shadow

Copy and Paste ele70 resize40%, add drop shadow

Copy and Paste ele72 resize40%, add drop shadow

http://tagsbydeborah.blogspot.com/2013/08/autumnsevening.html


Copy and Paste ele01add drop shadow
Resize to your liking, add copyright and name,

Layers merge visible effects, Xero Porcelain default settings
Thank you for trying my tutorial
I would love to see your results
and show off here
email your results here:
Deborah1023@gmail.com

Friday, August 16, 2013

AutumnsEvening"

This Tut was written by me on the  August 6, 2013 Done with PSP X2 but should work with others

Supplies Needed

Tube of choice - I am using the artwork of ©Alex Prihodko
You can find it  Here
www.picsfordesign.com
You must have a proper license to use this work.

Scrapkit- "JJS_AutumnsEvening"  by


Jackies Jewels

You can  HereJackie's Jewels- jackiesjewelsntags.blogspot.com and here http://www.mysticalscraps.com/


WSL Mask 84

http://weescotslasscreations.blogspot.com/2009/04/masks.html


font of choice


Drop shadow 1,1,60,5

Open blank image 600 x 600 floodfill white

New raster layer, select all, paste Paper3 into selection, select none.

Apply mask, merge group.


Copy and PasteFrame3  As A New Layer
resize 80%,


Using magic wand , select inside frame , select, modify , expand by 5, Copy and PastePaper1 as a new layer, resize 70%  selections, invert delete.

Arrange, move down. Drop shadow frame

Keep selected, add tube as a new layer, duplicate,select original tube delete, select none.

Move copy of tube above frame, using eraser, remove any parts from bottom of frame.

Copy and Paste Branch add drop shadowresize 40%

Copy and Paste Butterfly, add resize 40%, add drop shadow.

Copy and Paste FallingLeaves resize 50%, add drop shadow

Copy and Paste Flowers2add drop shadow.


Layers merge visible effects, Xero Porcelain default settings

Resize to your liking, add copyright and name,


Thank you for trying my tutorial
I would love to see your results
and show off here
email your results here:
Deborah1023@gmail.com

TootieCutie

TootieCutie

This tutorial was written by me on August 16, 2013. Any resemblance to any other tutorial is pure coincidence. Please DO NOT claim this tutorial as your own or post it to any other blog or website without permission from me. It was written for PSP X2, but should be compatible with any version of PSP. I wrote it assuming that you have a working knowledge of PSP and it's components.
My tutorials should only be used only as a guideline

Supplies Needed:
Tube Of Choice I am using a tube from ©Barbara Jensen

You must have a license and purchase tubes to use them
You can purchase their tubes here:
http://www.barbarajensentubes.com/

 MRSW_TootieCutie
You Can get it here
http://mouse-clicks.blogspot.com/


Mask of choice
I used AR315_mask023
Get it here:
http://aquarebel315.blogspot.com.

font of choice

Plug Ins


Ok Lets get started Drop shadow 1,1,60,5

Open blank image 600 x 600

New raster layer, selections, select all


Copy and Paste paper-styleB (1) into selection
Apply mask, merge group.

Copy and Paste I_frame01As A New Layer resize 60%


Using magic wand , select inside frame , select, modify , expand by 5, New raster layer, floodfill with color to match your tube
Arrange, move down. Drop shadow frameCopy and Paste paper-styleA (2 )As A New Layer selections invert delete move below frame layer

Keep selected, add tube as a new layer, duplicate,select original tube delete, select none.
Move copy of tube above frame, using eraser, remove any parts from bottom of frame.
Copy and Paste bow02As A New Layer resize40% Drop shadow

Copy and Paste cherries03 resize40% Drop shadow

Copy and Paste butterfly01 resize30% Drop shadow

Copy and Paste flower05 resize40% Drop shadow

Copy and Paste flower04 resize40% Drop shadow

Copy and Paste gem01 resize30%  Drop shadow duplicate resize40% duplicate mirror

Copy and Paste cherries03 resize40% Drop shadow


Add your name and copyright
layers merge visible save as a png

Thank you for trying my tutorial
I would love to see your results
and show off here
email your results here:
Deborah1023@gmail.com

Thursday, August 15, 2013

Rose Red

Rose Red

This tutorial was written by me on August 15, 2013. Any resemblance to any other tutorial is pure coincidence. Please DO NOT claim this tutorial as your own or post it to any other blog or website without permission from me. It was written for PSP X2, but should be compatible with any version of PSP. I wrote it assuming that you have a working knowledge of PSP and it's components.
My tutorials should only be used only as a guideline

Supplies Needed:
Tube Of Choice I am using a tube from ©Alex Prihodko

You must have a license and purchase tubes to use them
You can purchase their tubes here:
picsfordesign.com

 SWx-VintageFrames I Used Frame 4
You Can get them here
http://scrapworx.blogspot.com 


Mask of choice
I used Vix Big Mask 005
Get it here:
http://designsbyvaybs.blogspot.com/search/label/Masks

font of choice

Plug Ins
Xero porcelain
Penta Color Dot


Ok Lets get started Drop shadow 1,1,60,5

Open blank image 600 x 600

New raster layer, floodfill with color to match your tube

Apply mask, merge group.


Copy and Paste I_SWx-VintageFrame4 As A New Layer


Using magic wand , select inside frame , select, modify , expand by 5, New raster layer, floodfill with color to match your tube
Arrange, move down. Drop shadow frame

Keep selected, add tube as a new layer, duplicate,select original tube delete, select none.
on floodfill layer apply Penta Color Dot default settings
Move copy of tube above frame, using eraser, remove any parts from bottom of frame.


Add your name and copyright
layers merge visible save as a png

Thank you for trying my tutorial
I would love to see your results
and show off here
email your results here:
Deborah1023@gmail.com

http://tagsbydeborah.blogspot.com/2013/08/mysticalmayhem.html

"There's Snow Friend Like You"

"There's Snow Friend Like You"

This Tut was written by me on the  August 15, 2013 Done with PSP X2 but should work with others

Supplies Needed

Tube of choice - I am using the artwork of ©Alex Prihodko ,
You can find it  Here
www.picsfordesign.com
You must have a proper license to use this work.

Scrapkit- "There's Snow Friend Like You"  by Scraps by Danielle

You can purchase it  Here
http://scrapcandy.creativecandyland.net/


Vix_BigMask005

http://designsbyvaybs.blogspot.com/search/label/Masks


font of choice


Drop shadow 1,1,60,5

Open blank image 600 x 600 floodfill white

New raster layer, select all, paste Paperof choice  into selection, select none.

Apply mask, merge group.


Copy and Paste Copy and Paste Candy Ring As A New Layer

Using magic wand , select inside frame , select, modify , expand by 5, Copy and PasteChocoholic Paperof choice as a new layer,   selections, invert delete.

Arrange, move down. Drop shadow frame

Keep selected, add tube as a new layer, duplicate,select original tube delete, select none.

Move copy of tube above frame, using eraser, remove any parts from bottom of frame.

Add any elements of choice, using your imagination to create your own tag resizing to your own personal preference, use my tag as a reference

the papers and elements I used are:

Paper 1
Paper 9
Christmas Ball
Christmas Box with Bow
Christmas Tree with Bow
Snowman 
Bunny in Stocking 
Snowman Lantern
Layers merge visible effects, Xero Porcelain default settings

Resize to your liking, add copyright and name,


Thank you for trying my tutorial
I would love to see your results
and show off here
email your results here:
Deborah1023@gmail.com

Wednesday, August 14, 2013

For My Baby Sister

Just this side of heaven is a place called Rainbow Bridge.

When an animal dies that has been especially close to someone here, that pet goes to Rainbow Bridge.
There are meadows and hills for all of our special friends so they can run and play together.
There is plenty of food, water and sunshine, and our friends are warm and comfortable.

All the animals who had been ill and old are restored to health and vigor; those who were hurt or maimed are made whole and strong again, just as we remember them in our dreams of days and times gone by.
The animals are happy and content, except for one small thing; they each miss someone very special to them, who had to be left behind.

They all run and play together, but the day comes when one suddenly stops and looks into the distance. His bright eyes are intent; His eager body quivers. Suddenly he begins to run from the group, flying over the green grass, his legs carrying him faster and faster.

You have been spotted, and when you and your special friend finally meet, you cling together in joyous reunion, never to be parted again. The happy kisses rain upon your face; your hands again caress the beloved head, and you look once more into the trusting eyes of your pet, so long gone from your life but never absent from your heart.

Then you cross Rainbow Bridge together....

Author unknown...

"Dainty Blues "

"Dainty Blues "

This tutorial was written by me on August 14, 2013. Any resemblance to any other tutorial is pure coincidence. Please DO NOT claim this tutorial as your own or post it to any other blog or website without permission from me. It was written for PSP X2, but should be compatible with any version of PSP. I wrote it assuming that you have a working knowledge of PSP and it's components.
My tutorials should only be used only as a guideline

Supplies Needed:
Tube Of Choice I am using a tube from ©verymany

You must have a license and purchase tubes to use them
You can purchase their tubes here:
picsfordesign.com

 PTU Scrap Kit "DaintyBauble" by QueenBrat Designs
visit their sites here:
http://bitsnpiecesofqbd.blogspot.com/

:http://arkinserdigitaldesigns.com/store/


Mask of choice
I used Vix Big Mask 005
Get it here:
http://designsbyvaybs.blogspot.com/search/label/Masks

font of choice

Plug Ins
Xero porcelain
Xenofex constellation

dsb flux bright noise


Ok Lets get started Drop shadow 1,1,60,5

Open blank image 600 x 600 floodfill white

New raster layer, select all, paste BlueLace)into selection, select none.

Apply mask, merge group.


Copy and Paste I_BlueLaceFrame As A New Layer


Using magic wand , select inside frame , select, modify , expand by 5, Copy and PasteBlueSolid as a new layer,   selections, invert delete.

Arrange, move down. Drop shadow frame

Keep selected, addCU  tube as a new layer, duplicate,select original tube delete, select none.

Move copy of tube above frame, using eraser, remove any parts from bottom of frame.
add full tube as a new layer,add drop shadow.
Copy and Paste BlueBow resize 40%, add drop shadow.

Copy and PasteBlueOrganza, resize 40%, add drop shadow. duplicate 2 times

Copy and PasteBlueSequinScatter resize 40%, add drop shadow

Copy and Paste BFwTags Magic (41) resize 30%, add drop shadow.duplicate. mirror. flip merge down arrange send to bottom


WhiteBougainville, resize 30%, add drop shadow. duplicate. mirror.

Copy and Paste Lights2 resize 25%,add drop shadow.

Copy and Paste BlueDotBow, resize 40%, add drop shadow.


Layers merge visible effects, Xero Porcelain default settings duplicate. 2 times

**** Animation. If you are using the same tube as me with your lasso tool set at point to point draw around the top portion of the champagne


dsb flux bright noise repeat on next 2 copies clicking mix 2 then 3 times


Now draw     around the rest of the champagne

xenofex constellation following settings


Resize to your liking, add copyright and name, repeat on next 2 copies clicking random seed each time
 repeat same steps on earrings

now duplicate your backround 2 times x out top 2 copies of tag and bg layers merge visible now x out 
your just merged layer and un x top copy of tag and bg layers merge visible repeat for remaining copy making sure all 3 copies of your merged layers are unchecked save as a psp 7 file 

 Open Animstion shop and open your file you just saved click your view animation
   button  

and if you are satisfied with animation save as a gif file
Thank you for trying my tutorial
I would love to see your results
and show off here
email your results here:
Deborah1023@gmail.com

"MysticalMayhem"

"MysticalMayhem"

This tutorial was written by me on August 14, 2013. Any resemblance to any other tutorial is pure coincidence. Please DO NOT claim this tutorial as your own or post it to any other blog or website without permission from me. It was written for PSP X2, but should be compatible with any version of PSP. I wrote it assuming that you have a working knowledge of PSP and it's components.
My tutorials should only be used only as a guideline

Supplies Needed:
Tube Of Choice I am using a tube from ©Alex Prihodko

You must have a license and purchase tubes to use them
You can purchase their tubes here:
picsfordesign.com

 PTU Scrap Kit "MysticalMayhem" by FwTags
visit their store here:
http://berryapplicious.com/store/index.php?main_page=index&manufacturers_id=76


and now;
http://sensibilityscrapping.com/index.php?main_page=index&manufacturers_id=63


Mask of choice
I used Vix Big Mask 005
Get it here:
http://designsbyvaybs.blogspot.com/search/label/Masks

font of choice

Plug Ins
Xero porcelain


Ok Lets get started Drop shadow 1,1,60,5

Open blank image 600 x 600 floodfill white

New raster layer, select all, paste Paper (3)into selection, select none.

Apply mask, merge group.
duplicate mask layer
merge down.

Copy and Paste IPD_Frame (1)As A New Layer


Using magic wand , select inside frame , select, modify , expand by 5, Copy and PastePaper (2) as a new layer,   selections, invert delete.

Arrange, move down. Drop shadow frame

Keep selected, addCU  tube as a new layer, duplicate,select original tube delete, select none.

Move copy of tube above frame, using eraser, remove any parts from bottom of frame. change bltnd mode to luminance legacy
add full tube as a new layer,add drop shadow.
Copy and Paste FwTags Magic (24) resize 40%, add drop shadow.

Copy and PasteFwTags Magic (21), resize 40%, add drop shadow.

Copy and Paste FwTags Magic (23) resize 30%, add drop shadow

Copy and Paste BFwTags Magic (41) resize 30%, add drop shadow.


FwTags Magic (43), resize 30%, add drop shadow.

Copy and Paste Lights2 resize 25%,add drop shadow.

Copy and Paste FwTags Magic (42), resize 50%, add drop shadow.

Copy and Paste FwTags Magic (69), add drop shadow duplicate image mirror flip merge down layers arrange send to bottom
Copy and Paste FwTags Magic (68) resize 30%, add drop shadow.
Layers merge visible effects, Xero Porcelain default settings

Resize to your liking, add copyright and name,


Thank you for trying my tutorial
I would love to see your results
and show off here
email your results here:
Deborah1023@gmail.com

Tuesday, August 13, 2013

"Tropical Paradise"

"Tropical Paradise"


This tutorial was written by me on August 13, 2013. Any resemblance to any other tutorial is pure coincidence. Please DO NOT claim this tutorial as your own or post it to any other blog or website without permission from me. It was written for PSP X2, but should be compatible with any version of PSP. I wrote it assuming that you have a working knowledge of PSP and it's components.
My tutorials should only be used only as a guideline

Supplies Needed:
Tube Of Choice I am using a tube from ©Keith Garvey

You must have a license and purchase tubes to use them
You can purchase their tubes here:
www.garvgraphx.com
Gorgeous PTU Scrap Kit "IPD-CancunTropic" by Irish Princess Designs
visit their site here:
irishprincessdesigns.blogspot.com


Mask of choice
I used Vix Big Mask 005
Get it here:
http://designsbyvaybs.blogspot.com/search/label/Masks

font of choice

Plug Ins
Xero porcelain


Ok Lets get started Drop shadow 1,1,60,5

Open blank image 600 x 600 floodfill white

New raster layer, select all, paste IPD_CT_Paper6 into selection, select none.

Apply mask, merge group.
duplicate mask layer
merge down.

Copy and Paste IPD_CT_Window As A New Layer add drop shadow


Copy and Paste IPD_CT_Trees resize 70%, add drop shadow.Layers arrange move down

Copy and Paste IPD_CT_Water, Layers arrange move down

Copy and Paste IPD_CT_Sun resize 60%, add drop shadow

Copy and PasteIPD_CT_SandCastle, resize 30%, add drop shadow.


Copy and Paste IPD_CT_SeaGull resize 40%, add drop shadow.

Copy and Paste LIPD_CT_Torch resize 30%,add drop shadow.duplicate

Copy and Paste IPD_CT_Rainbow,

Copy and Paste Your tube

Layers merge visible effects, Xero Porcelain default settings

Resize to your liking, add copyright and name,


Thank you for trying my tutorial
I would love to see your results
and show off here
email your results here:
Deborah1023@gmail.com

Monday, August 12, 2013

"Boo"

"Boo"

"Boo"
This Tut was written by me on the  August 6, 2013 Done with PSP X2 but should work with others

Supplies Needed

Tube of choice - I am using the artwork of ©verymany
You can find it  Here
picsfordesign.com
You must have a proper license to use this work.

Scrapkit- "_Haloween_Kawaii"  by Claudia's Creationz

You can find it  Here
http://claudcreationz.blogspot.nl/


TTL Mask 1-1

http://truetagginlove.blogspot.com/


font of choice

animation
here
https://app.box.com/s/gfup3h1ll1ckr2ycm7a2

Drop shadow 1,1,60,5

Open blank image 600 x 600 floodfill white

New raster layer, select all, paste CC_ Paper  6 into selection, select none.


Apply mask, merge group.

Copy and Paste CC_ Frame 2 As A New Layer


Using magic wand , select inside frame , select, modify , expand by 5, Copy and PasteCC_ Paper  5 as a new layer,   selections, invert delete.

Arrange, move down. Drop shadow frame

Keep selected, add tube as a new layer, duplicate,select original tube delete, select none.

Move copy of tube above frame, using eraser, remove any parts from bottom of frame.

Copy and Paste CC_ Element 33  resize 40%, add add drop shadow

Copy and Paste CC_ Element 30, add resize 40%, add drop shadow.duplicate 2 times for a total of 3 with magic wand click on flame until majority is selected dsb flux bright noise 40 mix once repeat on next 2 copies

Copy and Paste CC_ Element 28 resize 30%, add drop shadow

Copy and Paste CC_ Element 18, resize 30%, add drop shadow.


Copy and Paste CC_ Element 43, resize 10%, add drop shadow.


Layers merge visible effects, Xero Porcelain default settings

Resize to your liking, add copyright and name, save as png if you wish to animate copy go to as paste as new image ctrl shift L until you have 11 frames edit select all make sure you are on first frame drag bats to desired position on tag save as gif file


Thank you for trying my tutorial
I would love to see your results
and show off here
email your results here:
Deborah1023@gmail.com

Saturday, August 10, 2013

"GothicTwilight"

"GothicTwilight"

This Tut was written by me on the  August 10, 2013 Done with PSP X2 but should work with others

Supplies Needed

Tube of choice - I am using the artwork of ©ZlataM,
You can find it  Here
www.picsfordesign.com
You must have a proper license to use this work.

Scrapkit- "AGP_GothicTwilight"  byAlexis's Graphics Palace

You can find it  Here
http://www.alexisgraphicspalace.blogspot.com


WSL Mask 84

http://weescotslasscreations.blogspot.com/2009/04/masks.html


font of choice


Drop shadow 1,1,60,5

Open blank image 600 x 600 floodfill white

New raster layer, select all, paste paper03 into selection, select none.

Apply mask, merge group.

Open blank image 600 x 600 floodfill white

New raster layer, select all, paste Paper 3 into selection, select none.

Apply mask, merge group.

Copy and Paste frame04 As A New Layer
resize 85%,


Using magic wand , select inside frame , select, modify , expand by 5, Copy and PasteAGP_GT_paper10 as a new layer,   selections, invert delete.

Arrange, move down. Drop shadow frame

 add tube as a new layer, add drop shadow.


Copy and Paste AGP_GT_ele58 add drop shadow.

Copy and Paste AGP_GT_ele07, add drop shadow.

Copy and Paste Flowers resize 30%, add drop shadow

Copy and Paste Bird2, resize 30%, add drop shadow.


Copy and Paste AGP_GT_ele47, resize 40%, add drop shadow. Duplicate

Copy and Paste AGP_GT_ele45 resize 40%,add drop shadow. Duplicate

Copy and Paste AGP_GT_ele57, Layers arrange send to bottom

Copy and Paste AGP_GT_ele54, add drop shadow Move above mask layer

Layers merge visible effects, Xero Porcelain default settings

Resize to your liking, add copyright and name,


Thank you for trying my tutorial
I would love to see your results
and show off here
email your results here:
Deborah1023@gmail.com

Tuesday, August 6, 2013

"Soft And Sweet"

"Soft And Sweet"

 This Tut was written by me on the  August 6, 2013 Done with PSP X2 but should work with others

Supplies Needed

Tube of choice - I am using the artwork of ©ZlataM,
You can find it  Here
picsfordesign.com
You must have a proper license to use this work.

Scrapkit- "Soft"  byRissa's Designs

You can find it  Here
http://rissasdesigns.blogspot.com/


WSL Mask 238

http://weescotslasscreations.blogspot.com/2009/04/masks.html


font of choice


Drop shadow 1,1,60,5

Open blank image 600 x 600 floodfill white

New raster layer, select all, paste Paper8 into selection, select none.

Apply mask, merge group.

Open blank image 600 x 600 floodfill white

New raster layer, select all, paste Paper 3 into selection, select none.

Apply mask, merge group.

Copy and Paste Frame6 As A New Layer
resize 80%,


Using magic wand , select inside frame , select, modify , expand by 5, Copy and PasteChocoholic Paper10) as a new layer,   selections, invert delete.

Arrange, move down. Drop shadow frame

Keep selected, add tube as a new layer, duplicate,select original tube delete, select none.

Move copy of tube above frame, using eraser, remove any parts from bottom of frame.

Copy and Paste ButterflyScatter add drop shadow.Duplicate, Mirror

Copy and Paste Cat1, add resize 40%, add drop shadow.

Copy and Paste Flowers resize 30%, add drop shadow

Copy and Paste Bird2, resize 30%, add drop shadow.


Copy and Paste Bow1, resize 40%, add drop shadow.

Copy and Paste Lights2 resize 25%,add drop shadow.

Copy and Paste Pearls, add drop shadow.

Copy and Paste Bloom, add drop shadow

Layers merge visible effects, Xero Porcelain default settings

Resize to your liking, add copyright and name,


Thank you for trying my tutorial
I would love to see your results
and show off here
email your results here:
Deborah1023@gmail.com

Sunday, August 4, 2013

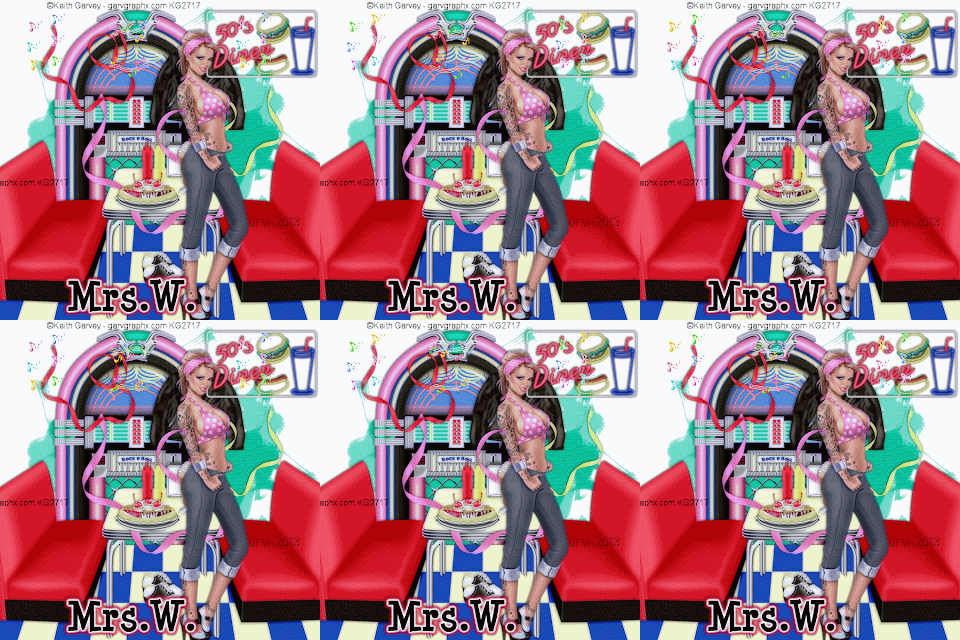
"At The Hop"

"At The Hop"


 This Tut was written by me on the  August 4, 2013 Done with PSP X2 but should work with others

Supplies Needed

Tube of choice - I am using the artwork of ©Keith Garvey,
You can find it  Here
www.garvgraphx.com
You must have a proper license to use this work.

Scrapkit- "50MaltShoppe"  byJill Watkins aka Mrs.W.

You can find it  Here
http://mouse-clicks.blogspot.com/


WSL Mask 360

http://weescotslasscreations.blogspot.com/2009/04/masks.html

Floaties supplied here

https://app.box.com/s/57x7u5rdxqwbte0zzqen

font of choice


Drop shadow 1,1,60,5

Open blank image 600 x 600 floodfill white

New raster layer, select all, paste plain (4) into selection, select none.

Apply mask, merge group.

Copy and Paste jukeboxAs A New Layer Drop shadow f
resize 80%,


Copy and Paste your tube, add drop shadow


Copy and Paste jacket (1)  resize 25%, add drop shadow.

Copy and Paste sign (1), resize 35%, add drop shadow.

Copy and Paste shoes, resize 25%, add drop shadow.

Copy and Paste booth,  resize 85%, add drop shadow.rmove below tube layer

Copy and Paste split resize 25%, add drop shadow.

Copy and Paste shake (2), resize 25%, add drop shadow.

Copy and Paste ribbon (1),  resize 25%, add drop shadow.

Copy and Paste ribbon (2), resize 25%,  add drop shadow.  mirror

Copy and Paste ribbon (5) resize 40%,add drop shadow


Resize to your liking, add copyright and name, x out tube layer
Layers merge visible
 copy go to animation shop right click paste as new image
ctrl sift L 6 times for 7 frames

open floatie in AS edit select all, edit select all on your tag also

making sure you are on the first frame on your tag and floatie, drag floatie to desired position on your tag

back to paint shop copy your tube layer back to AS and follow the same steps as the floatie


Thank you for trying my tutorial
I would love to see your results
and show off here
email your results here:
Deborah1023@gmail.com

"EmoSchoolGirl"

"EmoSchoolGirl"


This Tut was written by me on the  August 4,2013 Done with PSP X2 but should work with others

Supplies Needed

Tube of choice - I am using the artwork of ©Zlata_M,
http://www.picsfordesign.com/
You must have a proper license to use this work.

Scrapkit- "EmoSchoolGirl2"  by Irish Princess Designs
irishprincessdesigns.blogspot.com

WSL Mask 84

http://weescotslasscreations.blogspot.com/2009/04/masks.html

Plug Ins

Xero Radiance

font of choice Im using Gothic Hijinx


Drop shadow 1,1,60,5

Open blank image 600 x 600 floodfill white

New raster layer, select all, paste Paper4  into selection, select none.

Apply mask, merge group.

Copy and Paste Frame As A New Layer
resize 80%,


Using magic wand , select inside frame , select, modify , expand by 5, Copy and Paste Paper1 as a new layer, resize 60%  selections, invert delete.

Arrange, move down. Drop shadow frame

Copy and Paste Close Up of your tube, image mirror, drop shadow. effects xero radiance default settings, move below frame layer and erase any parts sticking out from frame. Lower opacity to 75


Copy and Paste Bow add drop shadow

Copy and Paste Bear, resize 65%, add drop shadow.

Copy and Paste Balloon, resize 50%, add drop shadow.

Copy and Paste SkullRose, add drop shadow.

Copy and Paste Scatter rmove above mask layer

Copy and Paste GirlSkull, resize 25%, add drop shadow.
layers arrange, bring to top

Copy and Paste Button, add drop shadow,  resize 40%, add drop shadow. 

Copy and Paste BackPack, resize 40%,  add drop shadow. 

Copy and PasteGlobe resize 40%,add drop shadow

Copy and Paste full tube  add drop shadow. 

Resize to your liking, add copyright and name,
Layers merge visible


Thank you for trying my tutorial
I would love to see your results
and show off here
email your results here:
Deborah1023@gmail.com

Friday, August 2, 2013

"Gothic Gurl"

"Gothic Gurl"

This Tut was written by me on the August 2nd 2013 Done with PSP X2 but should work with others

Supplies Needed

Tube of choice - I am using the artwork of ©Keith Garvey,
www.garvgraphx.com
You must have a proper license to use this work.

Scrapkit- "GOTHIC_Girl"  by Claudia's Creationz

You can find it  Here

Here: http://claudcreationz.blogspot.nl/

0mask046_LT

Right click and save


Drop shadow 1,1,60,5

Open blank image 600 x 600 floodfill white

New raster layer, select all, paste Paper 2  into selection, select none.

Apply mask, merge group.

Copy and Paste Element 26 As A New Layer
resize 80%, Again by 70%


Using magic wand , select inside frame , select, modify , expand by 5, Copy and PastePaper 6 as a new layer, resize 60%  selections, invert delete.

Arrange, move down. Drop shadow frame

Keep selected, add tube as a new layer, duplicate,select original tube delete, select none.

Move copy of tube above frame, using eraser, remove any parts from bottom of frame.

Copy and Paste Element 14 add drop shadow  Move above mask layer

Copy and Paste Element 38 resize 30%,  add drop shadow. 

Copy and Paste  Element 19 resize 30%, add drop shadow.

Copy and Paste  Element 19 Again, resize 40%, add drop shadow.Mirror

Copy and Paste Element 39, resize 40% add drop shadow.

Copy and Paste Element 20 resize 30%,add drop shadow.

Copy and Paste Element 18, resize 60%, add drop shadow.

Copy and Paste Element 3, add drop shadow,

Copy and Paste Element 24, resize 60%,  add drop shadow. 

Resize to your liking, add copyright and name,


Thank you for trying my tutorial
I would love to see your results
and show off here
email your results here:
Deborah1023@gmail.com